|
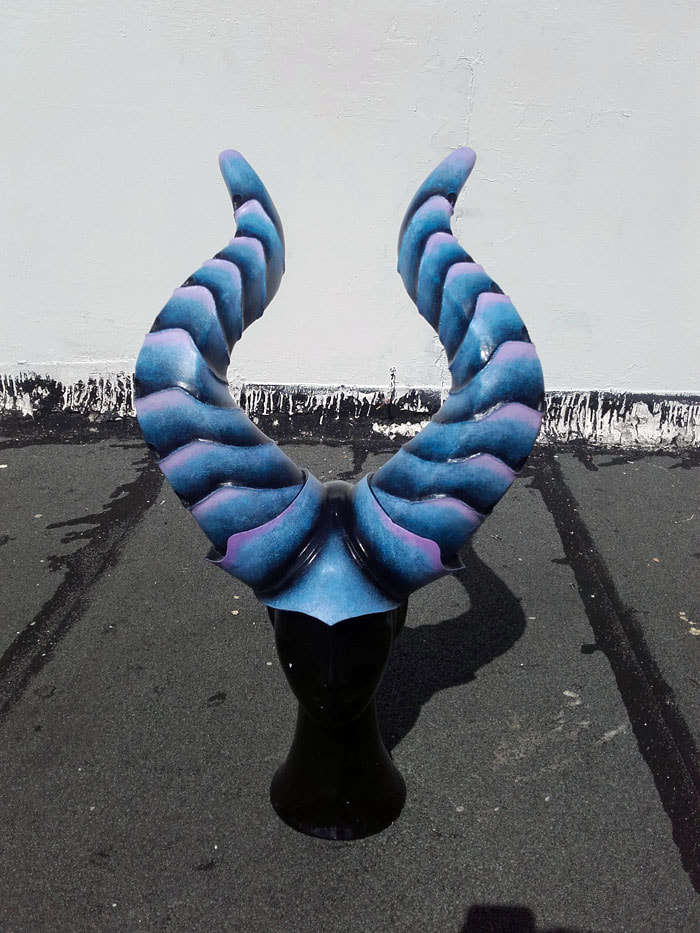
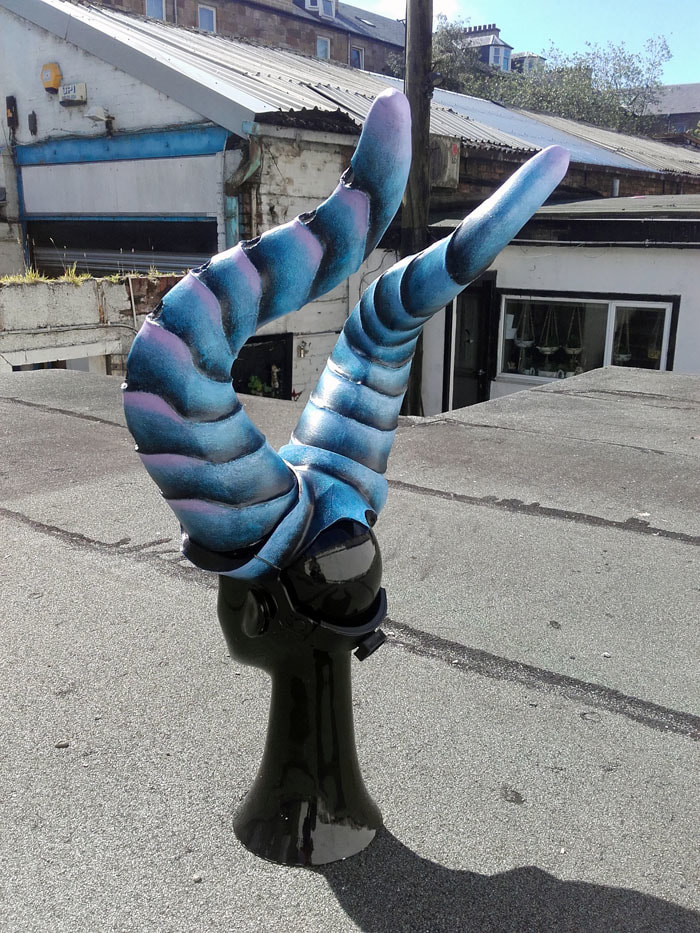
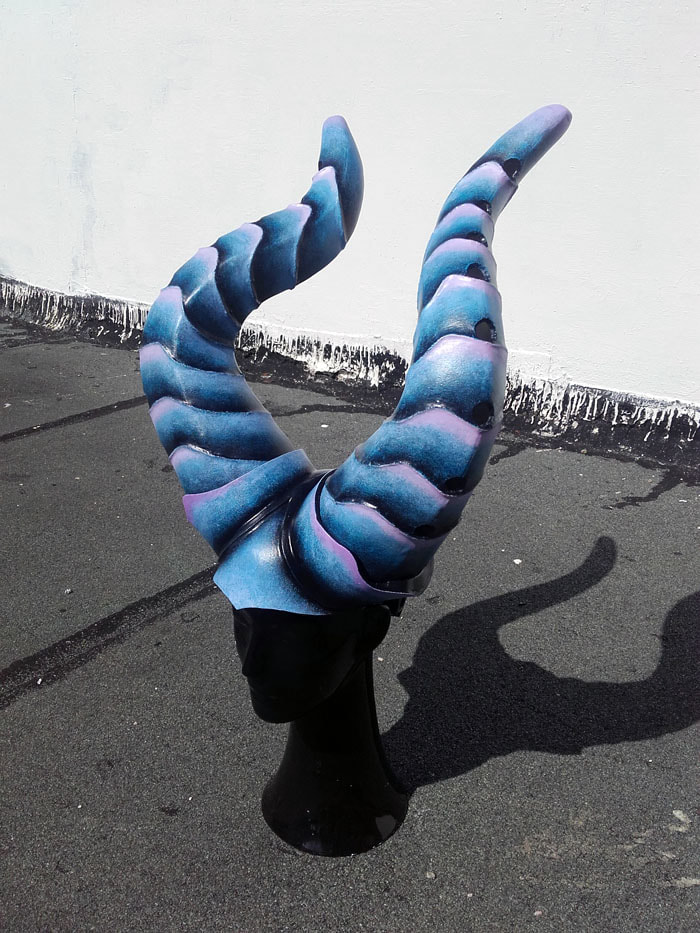
Just finished working on these large musical horns. It's been a great, fun job and I had the chance to try out some new making techniques, which was really exciting. Last October I made a smaller set of horns for the walkabout performance by Diane Thornton called Dance Wi' The Deil. This year, with performances at larger festivals on the cards, we decided to upscale the speakers and horns to increase impact. The Minirig speakers we're using now are very loud, and work in stereo using bluetooth from a mobile phone. Although they are small for such powerful speakers, they are fairly bulky objects to wear on your head, so I knew the rest of the headpiece had to be well secured, and as lightweight as possible. The horns themselves are made from sheets of 3mm P120 Plastazote foam. It's very lightweight, and can be stretched or heat formed into interesting shapes. Below you can see the stages of making the horns - 1. Four strips which work like the segments of a beach ball make the horn shape 2. Contact adhesive to join the strips, which are begining to take the form in this photo 3. The last stages of joining the foam with the contact adhesive are very fiddly, but it's super satisfying seeing the hollow horn take shape 4. Marking out holes for the sound to escape and drawing where I would like ridges to go 5. Cutting out the holes, and hot glueing string along the lines of the ridges 6. Covering the string ridges (and any other imperfections) with caulk, then smoothing out with water 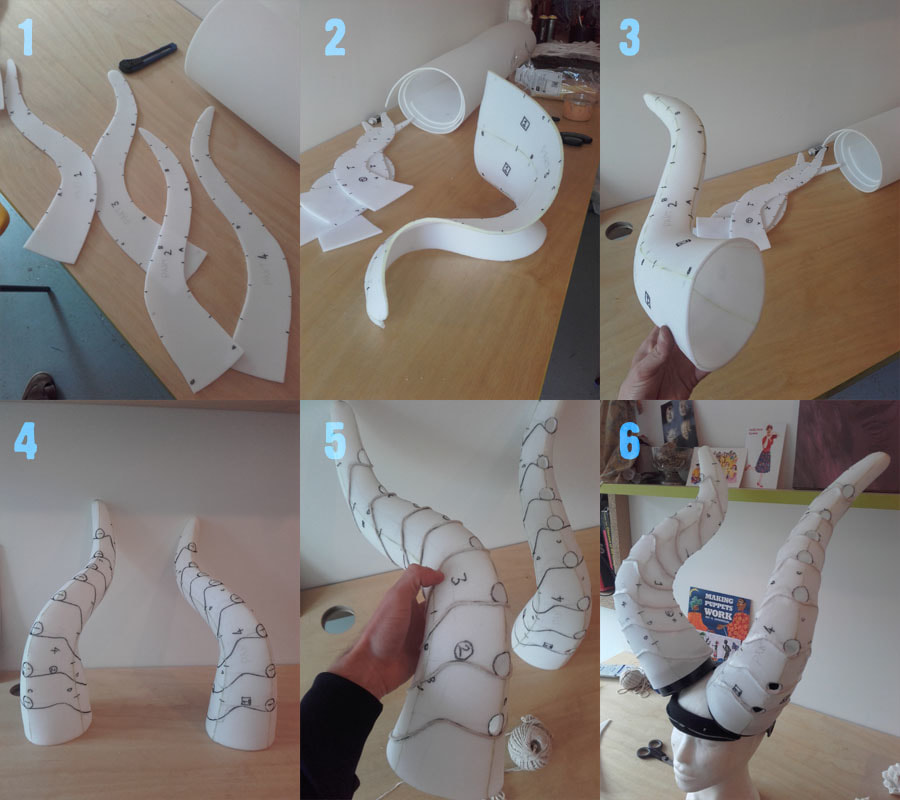 I then painted the horns with eight layers of watered down PVA glue, which took ages, but the final surface was lovely and smooth. Following that, the stages of painting were - 7. Priming with gesso 8. A coat of black acrylic 9. A transparent glaze of dark blue over the black to make the dark tones a little richer 10. Dry brushed layer of bright blue to give the colour body, leaving a shadow area above the ridges 11. Dry brush layer of light purple to brighten it up, leaving both the blue and shadow visible towards the ridges 12. Dry brush highlight in pink around the front edge of the ridges to draw attention to them 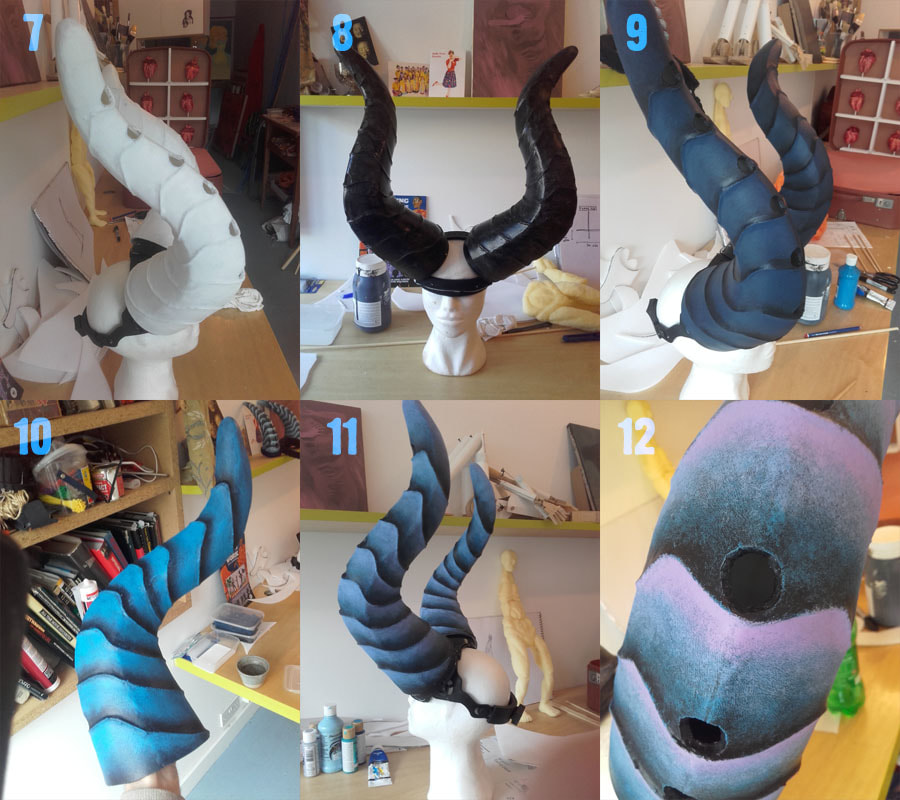 The horns themselves were then incorporated into the headpiece - 13. A welder's visor provided the plastic frame for the headpiece 14. Two tubs of car wax turned out to be exactly the right size for the speakers to fit inside 15. The Minirig speakers fitted snugly inside the tubs 16. The horns then slot over the speakers and tubs 17. I used more of the P120 foam to make a central piece which covers the plastic frame and forms the base of the horns. I then caulked the joins of this central piece and also coated it with eight layers of PVA 18. The central piece was painted, following the same steps as the horns, before the headpiece was varnished with several coats of Rust-oleum Crystal Clear matt spray varnish 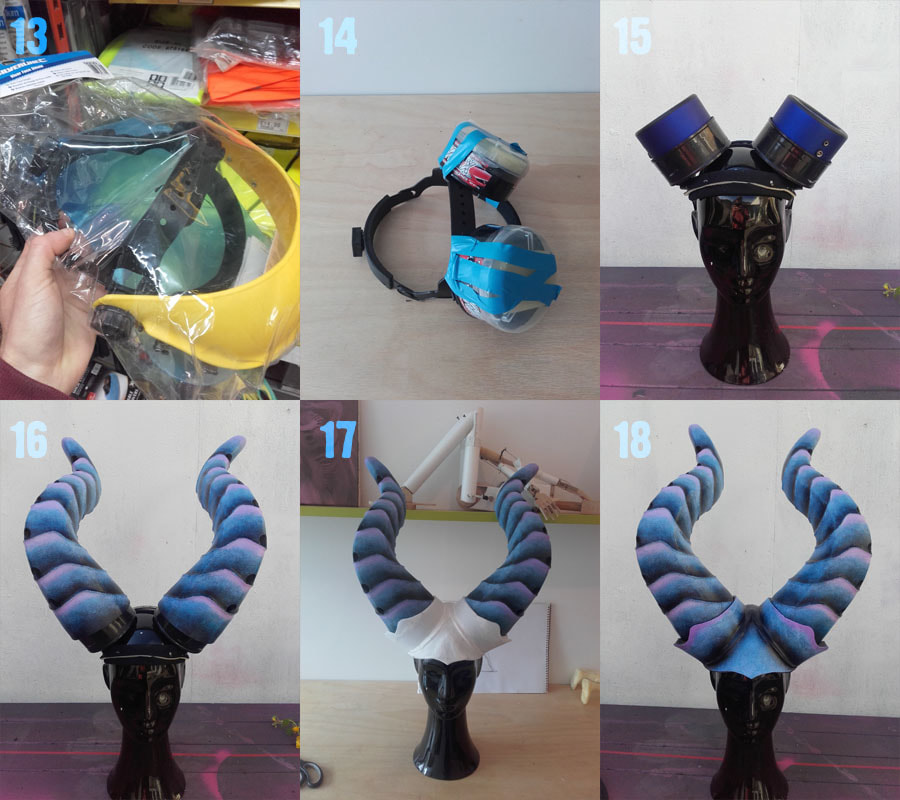
0 Comments
Leave a Reply. |
AuthorI am a Glasgow based collaborative artist Archives
January 2024
Categories |
 RSS Feed
